Friday 28 February 2014

UDK adding normal's to textures

After I had a functioning texture saved as a .tga or targa, I was able to create a normal for it. Normal's are height information that give depth to textures. We used a software called Crazy Bump to create the normal's.

Crazy bumps main menu
We add a opened a photograph from file and selected in which direction we wanted the height to go. This is really redundant because it can be changed after this step.

select weather the normal is coming out of the wall or going into it. 
Once selected we get a pop-up of a preview window and some sliders.

Crazy bump, editing screen
You can really just play around with these until your happy with the result. It must be saved as a .tga
After this we import the saved file into UDK. Just import it to your personal package to keep things clean.

UDK import screen
Then the only thing left is to create a new material and attach our normal and our diffused to it.

Plugging in textures and normal into the correct blocks
 The finished result can look something like this.

Finished and applied texture with normal


Tuesday 25 February 2014

UDK Cinematic Sequneces

Today we learned how to create cinematic sequences. I followed the world of level design tutorial.
I created a small intro scene where the camera directs the player to a key within my level.

I started off by adding a camera in from the actor classes section of the content browser

Adding in a camera actor into UDK

After that I added in a trigger and then went into kismet. I attached the trigger to a toggle cinematic mode block which locks the player in place so they can't move while the scene is playing.
I then plugged it into a matinee and another cinematic to "un-stick" the player when the matinee finished

Kismet for a cinematic sequence

To start making the cut scene I opened the matinee and right clicked and added a new camera group and a director group.
Then I dragged the camera along the path I wanted adding in key points by pressing enter along the way.

UDK Matinee 


UDK matinee
Sounds can also be added in by adding a play sound block and using sound cues from the content browser. Just attach them to the start of the matinee and the end of the matinee, but I did not do this as of yet.

Tuesday 11 February 2014

UDK explosions

We started off by adding in a trigger and a particle effect. Mine is of an explosion.
There are many options available in the content browser.

Content browser, particle effects

We then have to go into kismet and begin to program. We add a trigger of type touch. We then add a toggle and modify health block. We the add a variable of player and attach it to the trigger as instigator and to the modify health as its target.

Kismet for damaging health

 Next we select the particle effect which we added and right click in kismet and add both an object variable and  new event using " particle effect" particle event. We then attach the new object variable to the toggle as its target and the modify health as its instigator.

Finally we attach the particle event to the toggle as an event.

Kismet for damaging explosion

The very last thing to do is to click on modify health and change the amount, radius and falloff to suit your requirements

Properties of modify Health


UDK flashlight

Note: You must set a game type under world properties

We start by dropping in a spotlight move-able and a player start. They must be close to each other and facing the same direction.

Converting a light to a spotlight movable

We then can jump into the lights properties and decrease the lights influence area and colour to give it a glow to make it seem more like a torch.  

Spotlight properties

Once its in the next step is to jump into kismet and start a bit of programming.
We start by adding a level loaded and attach to actor block. We set the attach to actors target to players and un-tick the option within it that selects all players. We then must a attach the light to its attachment option. 

Flashlight kismet

At this stage the light will work and follow the player however the lower part of the code deals with making the light toggle-able. Add in the key/button pressed and toggle blocks.

We add E as an input name. Then when pressed it will activate the toggle block and toggle the light on and off.

Kismet for toggling flashlight

This is the finished result.

Finished flashlight in UDK

UDK lighting/triggers continued

Note: You must set a game type under world properties

Today we worked on the lighting of our level by practicing adding toggle able lights. They can be uses fully in creating light switches and many other things.

Firstly we add in a light and then we convert it to a spotlight toggle-able. Once this is done we add a trigger of type used and jump into kismet.

Converting the light to a spotlight toggle able

We add the trigger and then drop in a play announcement block to notify the player of what action is required. We then added a toggle block in and used the light from before as its target. We must also set the triggers max trigger count to 0 if we want to be able to do this an infinite amount of times
Kismet for toggle able light


Increasing the size of the trigger is usually good practice.

Trigger to activate light

And after all of that we are left with this.

Finished toggle able light.


The same play announcement code can be used to notify the player of any new events such as entering a new area.

Trigger attached to play announcement


UDK making and adding tile-able textures

Firstly we start by getting pictures to work from. Then we take them into Photoshop and create a new page to the power of 2 i.e. 256 x 256, 512 x 256. Scale it up as necessary.

We then select the filter, other and offset. This will basically split it in four and piece it back together again.
We must offset the image by the size of the canvas it is on.

Photoshop, filter offset option

Then we use tools like the clone stamp, dodge, burn and sharpen to mask the cross section that will have appeared in the center. After using these tools we are left with something like this.

Finished tile able texture
There are no visible lines remaining through the center of the image anymore and so we are ready to save it as a Targa (.TGA) of 16 or 32 bits.

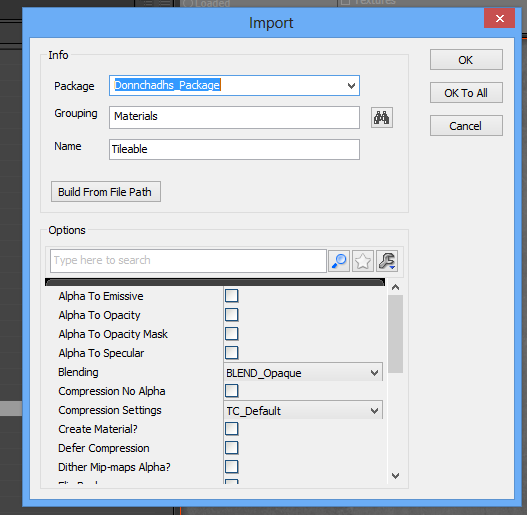
We then open up UDK and edit the and go to our package and import our new grass texture.
Make sure to give it an appropriate grouping. 

Import screen in UDK
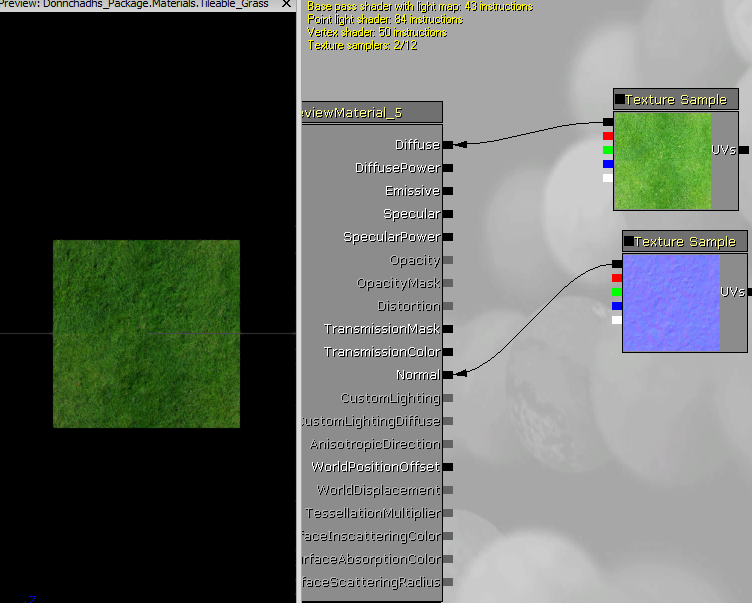
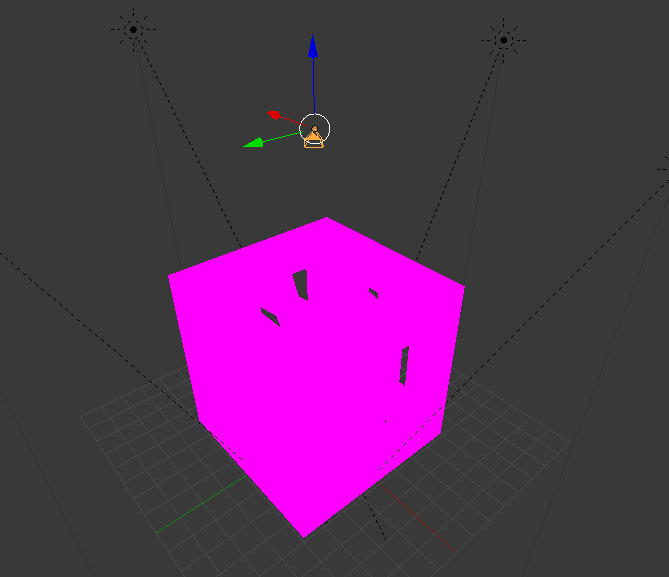
We then must right click in UDK while on the content browser with the imported texture selected and choose to create a new material. Then we drag in our texture and connect it to the diffuse option.

Connecting my texture to the correct blocks 
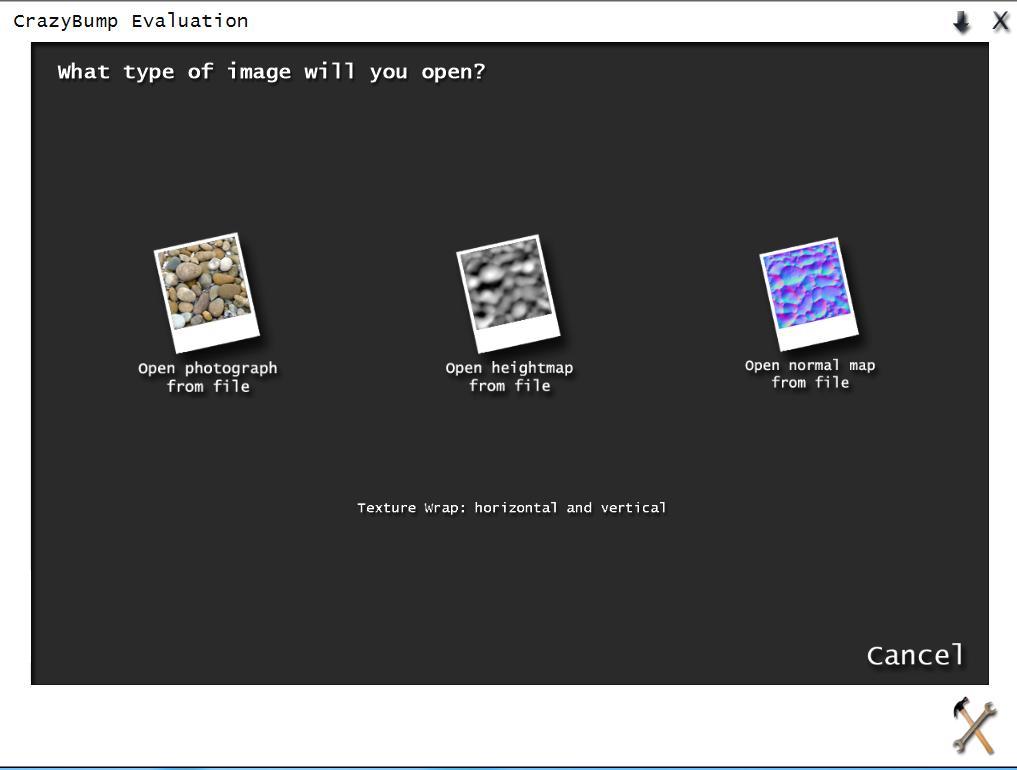
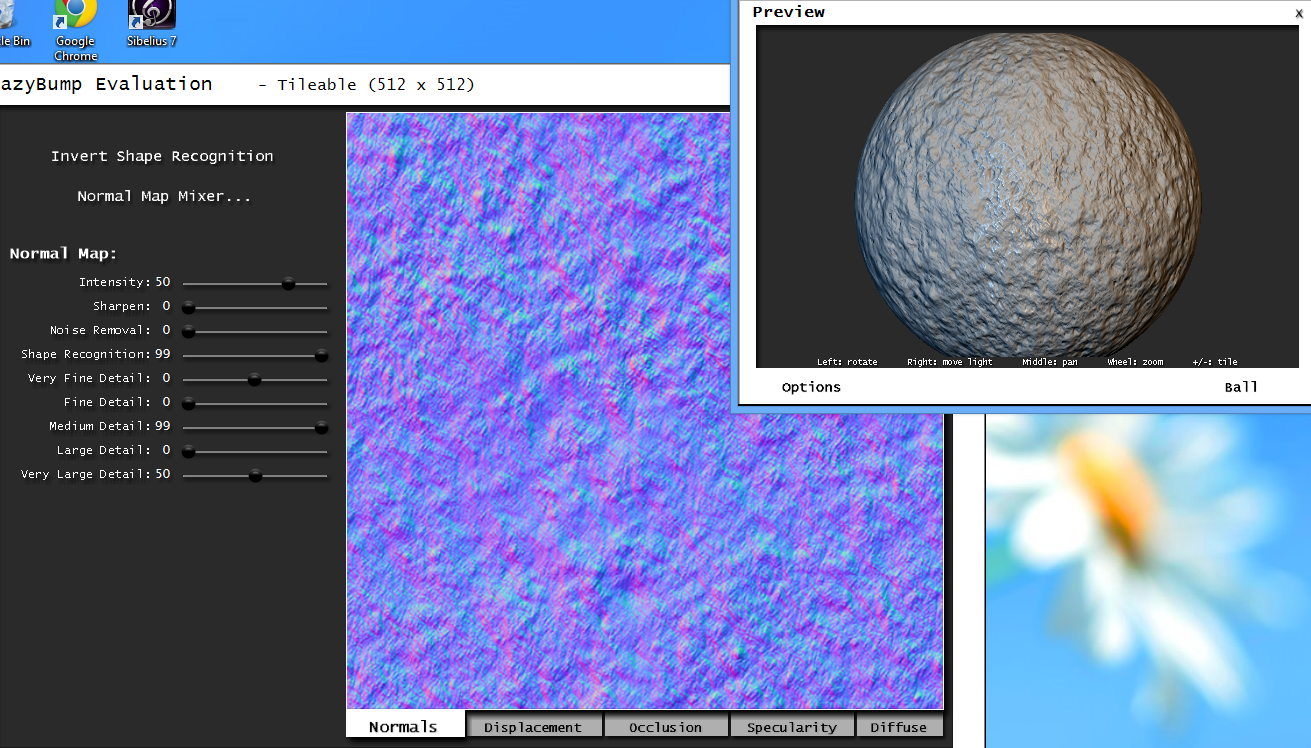
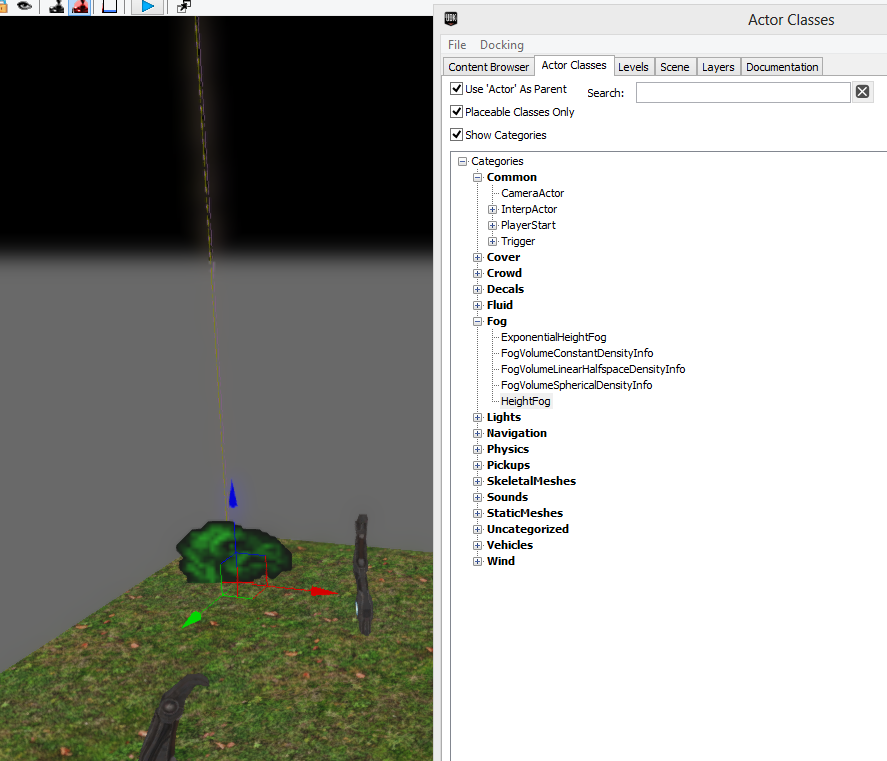
You now have a texture ready to be used, however there is an additional thing called normal's for textures which we haven't covered yet but we will be soon.

Making a non-tile able texture follows the exact same process except with using the offset filter option used at the start. 

Non tileable.PNG
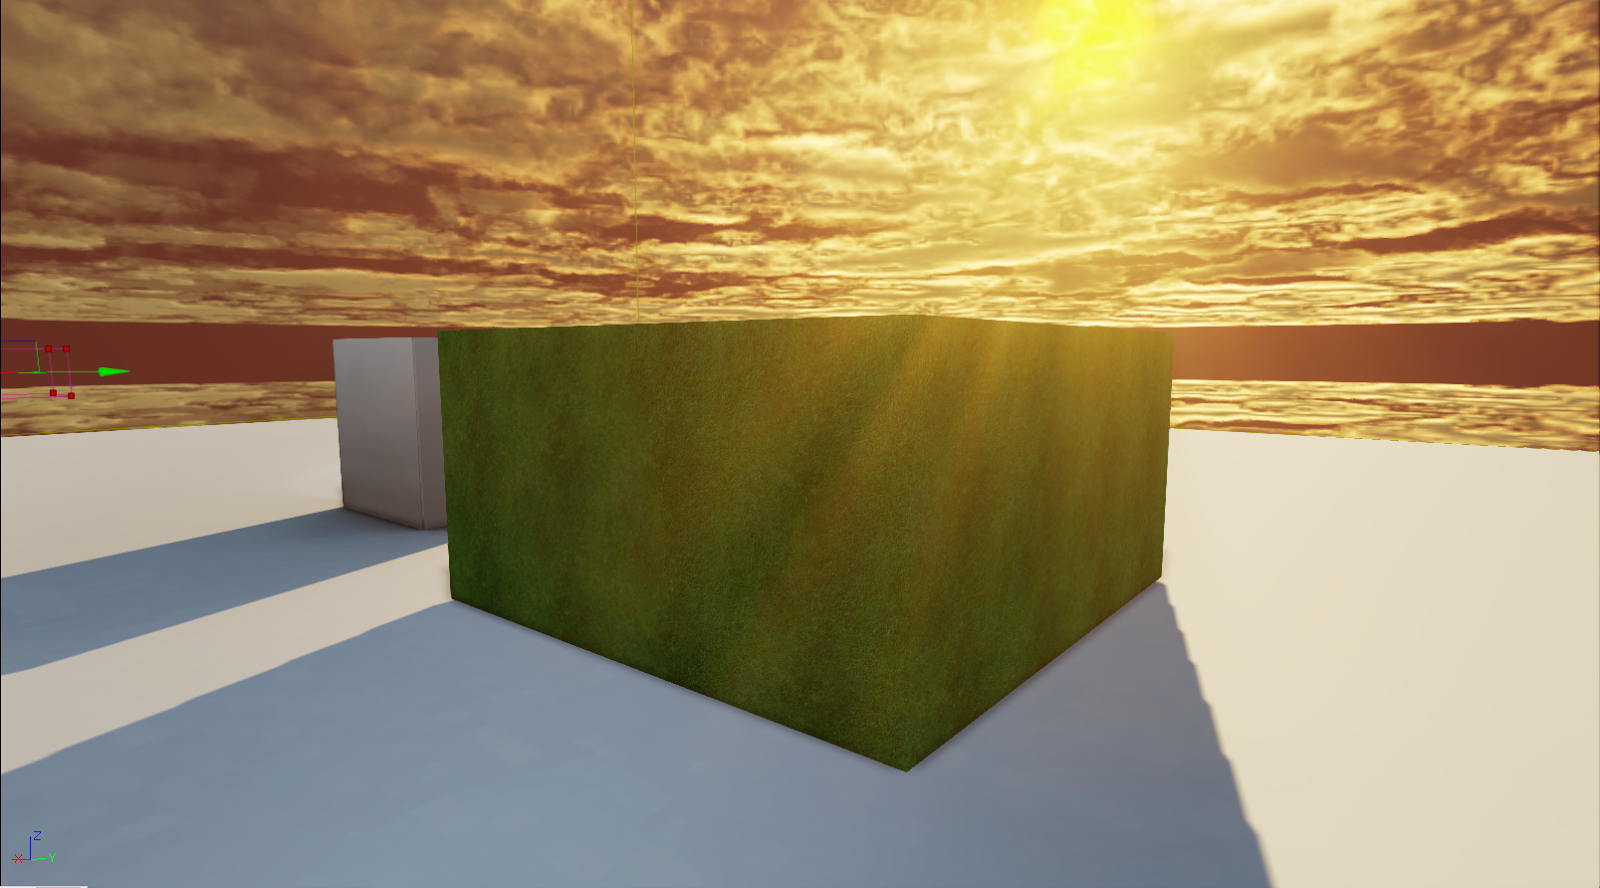
Finished non-tile able texture applied in UDK

Monday 10 February 2014

UDK lighting

Today we jumped into the properties of the lights in our levels. I changed my dominant direction light and changed it to appear slightly more orange give the illusion that the sun is shining

colour sample wheel
Level overview with lighting
This can give the level a whole new feel. If I were to change it to be more blue the level feels colder.

After some work on the dominant direction light I moved onto static mesh emissive lighting.
Firstly we need a static mesh i.e. a light bulb. Then we need to jump into its properties and switch on emissive lighting as it is default set to off.

Properties of a staticmesh
Once this has been done we can change the radius which the light will affect and we can add boost to the diffuse and emissive.

We jumped into a blank map and created a hollow room to test our lighting in.
Firstly we brought in our mesh, changed the properties and built lighting.
This was my result.

Three lights being demenstraighted
It is easy to see that by using this method you can make a level look much more vibrant and alive.

Saturday 8 February 2014

UDK adding Decal

Today we jumped into the properties of the lights in our levels. I changed my dominant direction light and changed it to appear slightly more orange give the illusion that the sun is shining

colour sample wheel
Level overview with lighting
This can give the level a whole new feel. If I were to change it to be more blue the level feels colder.

After some work on the dominant direction light I moved onto static mesh emissive lighting.
Firstly we need a static mesh i.e. a light bulb. Then we need to jump into its properties and switch on emissive lighting as it is default set to off.

Properties of a staticmesh
Once this has been done we can change the radius which the light will affect and we can add boost to the diffuse and emissive.

We jumped into a blank map and created a hollow room to test our lighting in.
Firstly we brought in our mesh, changed the properties and built lighting.
This was my result.

Three lights being demenstraighted
It is easy to see that by using this method you can make a level look much more vibrant and alive.

UDK Landscape editor

The landscape editor is basicly a better version of the terrain mode that we used in the past, the reason being is that it uses less memory and works on mobile maps.

The first window that will pop up when you open the landscape editor is a terrain creator. Similar to the terrain creator you input the size and the component size(number of square per section), then just click create.

Landscape editor

Once you have clicked create you will see the genorated landscape.

Adding landscape

To increase the size of my level I added in new components using the add new landscape component tool

Adding sections to landscape

Using the paint, smooth, flatten, ersoion and noise tools you can quickly and easily create huge mountains and bottomless pits.

Editing the shape of the landscape

Finaly one of the best things that I found was regional copy/paste tools as well as the regional selection tool.
They can be use to minic an area that you have already complete and can be a huge asset in saving time.

Using the copy tool

UDK Foliage

Today we learned how to use the foliage tool in UDK. It is mainly used to paint areas with grass static meshes of grass, vines and even rocks. A down side to using the foliage editor is the fact that it adds so many meshes that it can consume a huge amount of memory. The best thing to do is to use it sparingly.


varios meshes painted in by foliage editor

First find the mesh you want in the content browser and then drag and drop it into the foliage editor. Once the mesh has been fully loaded and selected you can painted onto the desired surface by holding down ctrl+right click and to remove them just hold down shift+ctrl+left click.

Just like the ladscape editor the brush size and destiny can be adjusted to the situation.

Foliage editor

When the mesh has been brought into the editor you can change the settings of scale, pitch etc. this can break up the repeating nature of the mesh.

Foliage editor


Friday 7 February 2014

UDK custom static meshes

Firstly you must go out to the internet and find a static mesh that you want. I choose a crate.

Check the file type, it must be one of the following to work .fbx, .dae, .stl, .ply. Other file type can be used 
but these are just a few examples. Basically any file that works in the Blender program is suitable. Some of the websites I used were 


  • Turbo Squid
  • Blend Swap


  • Image of my mesh

    Once you have found, downloaded and opened the file in Blender we can begin.

    Blender editor

    Sometimes when you import meshes their layers maybe split up. You can join them together by selecting them all (shift+Right click) and the using the short cut(Ctrl+J). I advise deleting any cameras or lighting also imported as they provide no purpose to the best of my knowledge.

    Once all of this is done you must export the file as a .fbx. Then go to UDK open the content browser and drag and drop in your new mesh. A screen will pop up with various settings. They only important thing that you must set is to set import type: Static Mesh and Import Materials.

    UDK import menu

    Sometime the files you get for the internet may not be 100% compatible and the mesh might appear broken or what may also happen is the materials that where on the mesh may not be available in UDK and you may need to re-texture them.


    Thursday 6 February 2014

    UDK fog and wind

    Firstly we opened the content browser and go to actor classes

    Actor Classes tab

    We then scrolled down to the wind option and clicked on the drop down menu.
    I selected the wind point source option as it achieved the effect I desired most efficiently.

    Side wire frame view

    As you can see this option has an area of influence which can be adjusted in the properties.
    Also the strength and speed at which the wind blows can be adjusted to suit your preference. 

    wind source properties 
    I tried to keep grass static meshes out of the area of influence as this some times happens.

    Foliage glitching in UDK

    I then tried adding in fog around my map to block the view of the edges of the map.

    Fog volumes, actor class

    Again just go to the content browser and select actor classes and scroll down to fog and drag and drop one of the options.

    By adjusting the fog density you can make the fog easier or harder to see through.
    The colour of the fog is also adjustable;e and can add quite a bit to the atmosphere.

    Fog volumes properites

    All that you need to do is change the colour values and the fog will automatically adjust its colour.