Tuesday 8 April 2014

Conclusion Post

At the start of this course I had only a basic understanding of computer games and how they worked and over the last 6 months I have learned a great deal about the creation process involved in making a fully functional game.

The first thing we learned to use was a browser based software called Scratch. It is a free 2D game creation software.

Capture of the scratch home page
At the start of the year we were taught how to use it and eventually we were tasked with creating our very own 2D games.

The next software that we were introduced to was Adobe Photoshop.
Photoshop logo
We learned how to use most of the tools within Photoshop relating to vectors. We even made the graphics for our 2D game using Photoshop.

After some weeks we went on to use our first 3D game software, UDK.

UDK or Unreal Development Kit is a free copy of Unreal Engine 3 that anyone can download.

Unreal's logo
At first the software seem to be impossible to navigate but after about 10-15 minutes it became much easier to use. The software can be used to produce both 3D and 2D games for all platforms.
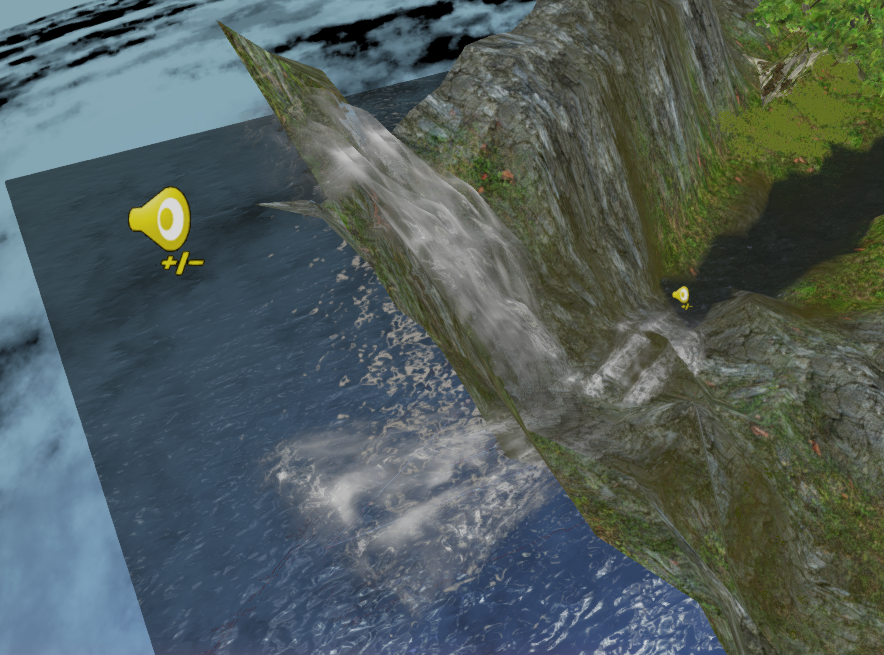
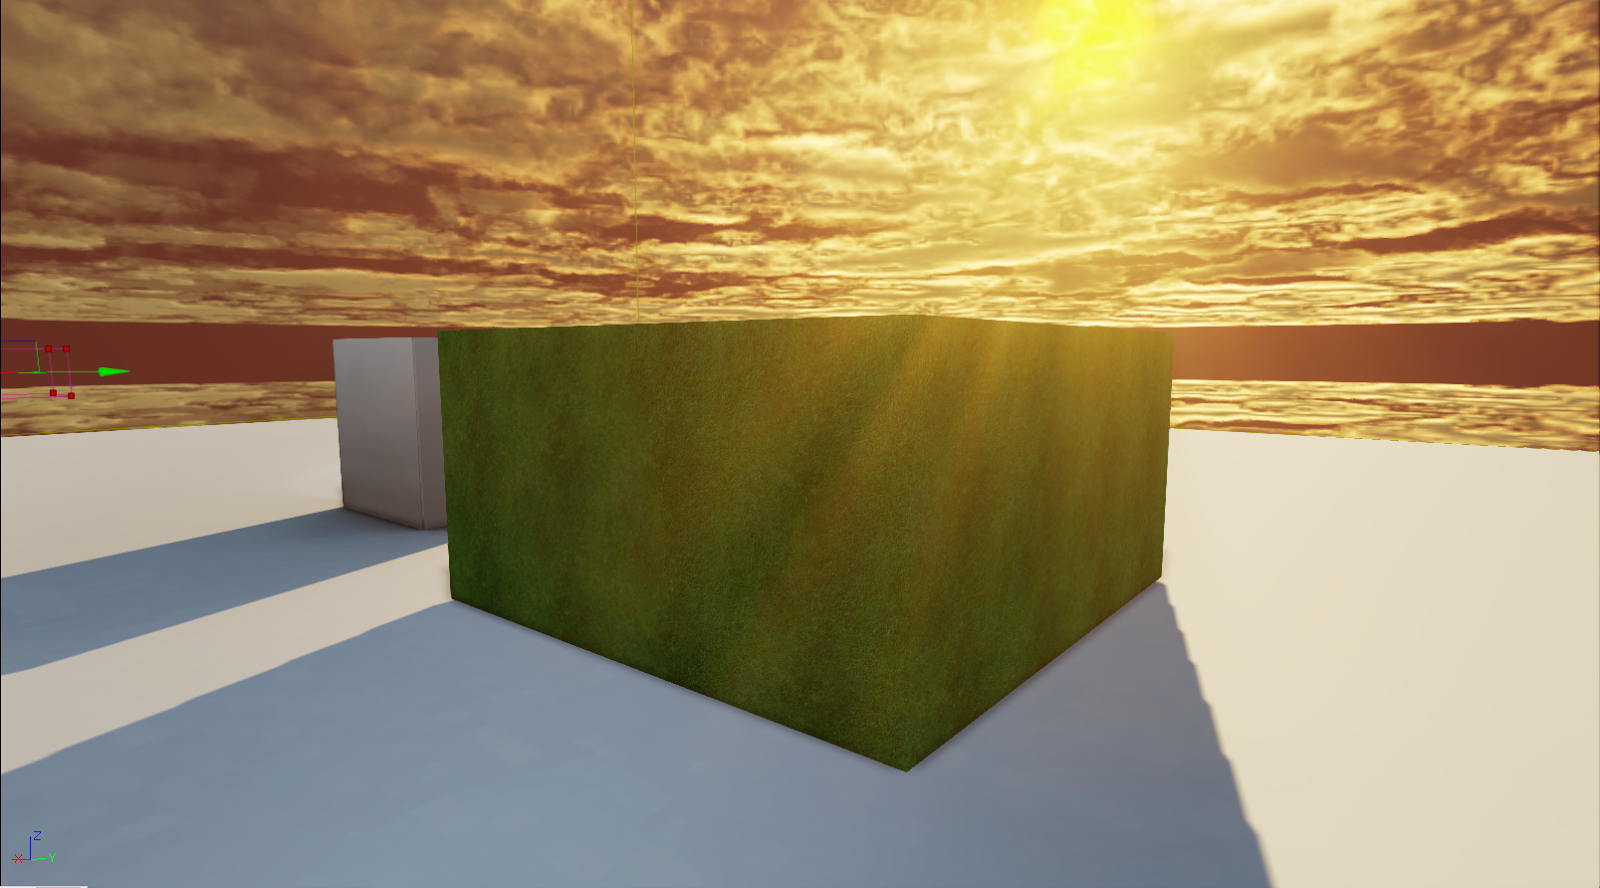
We used the software to create our own 3D game for assessment, the same 3D game that I have been documenting for the past few months. 

I have learned how to create a fully functional 3D level using the tools that are readily available in UDK. 

I have learned:
  • how to create my own custom landscape,
landscape editor in UDK
  • how import custom static meshes that can be used in UDK,
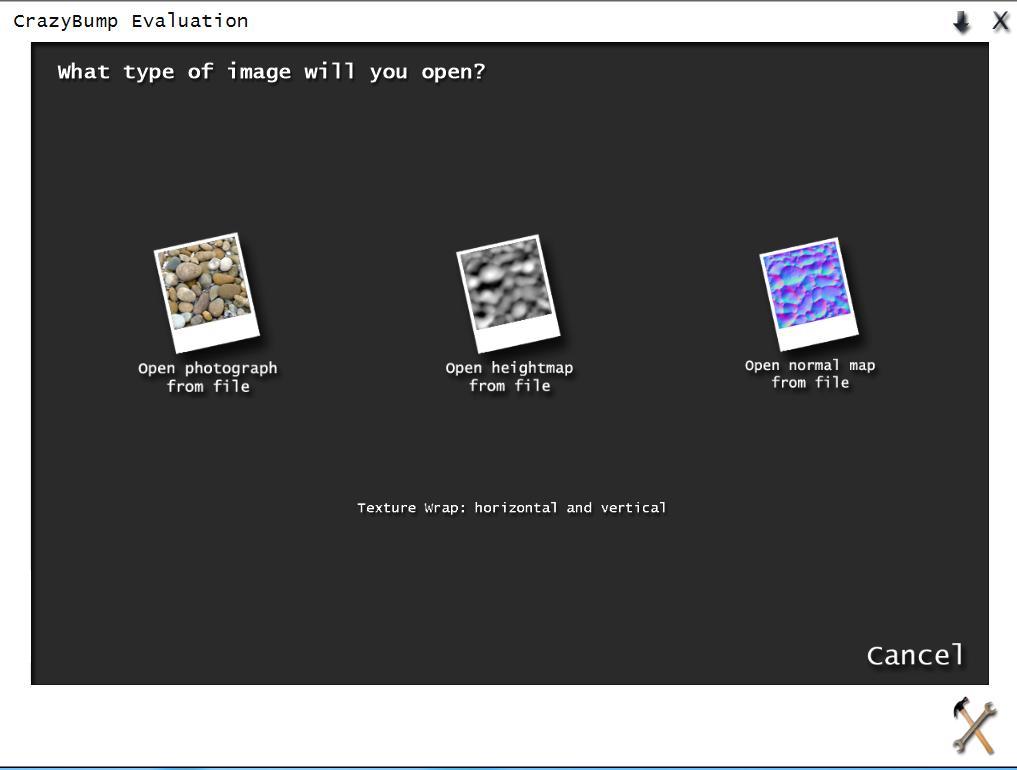
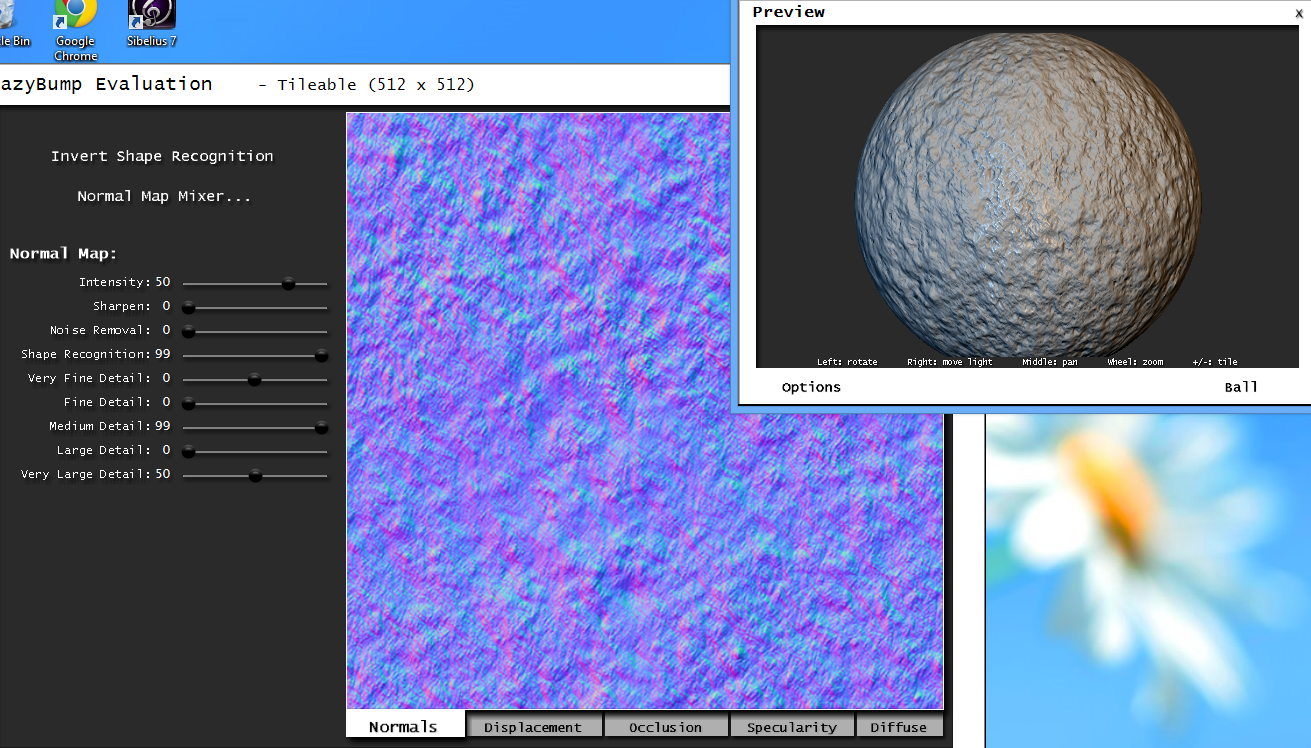
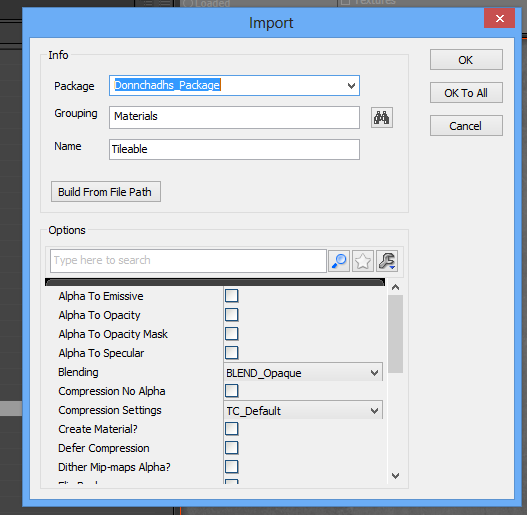
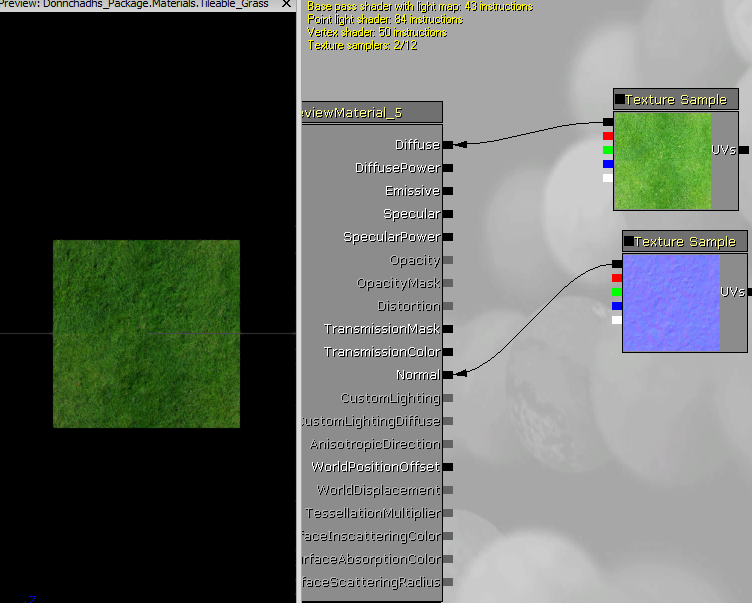
  • how to create my own custom textures, 
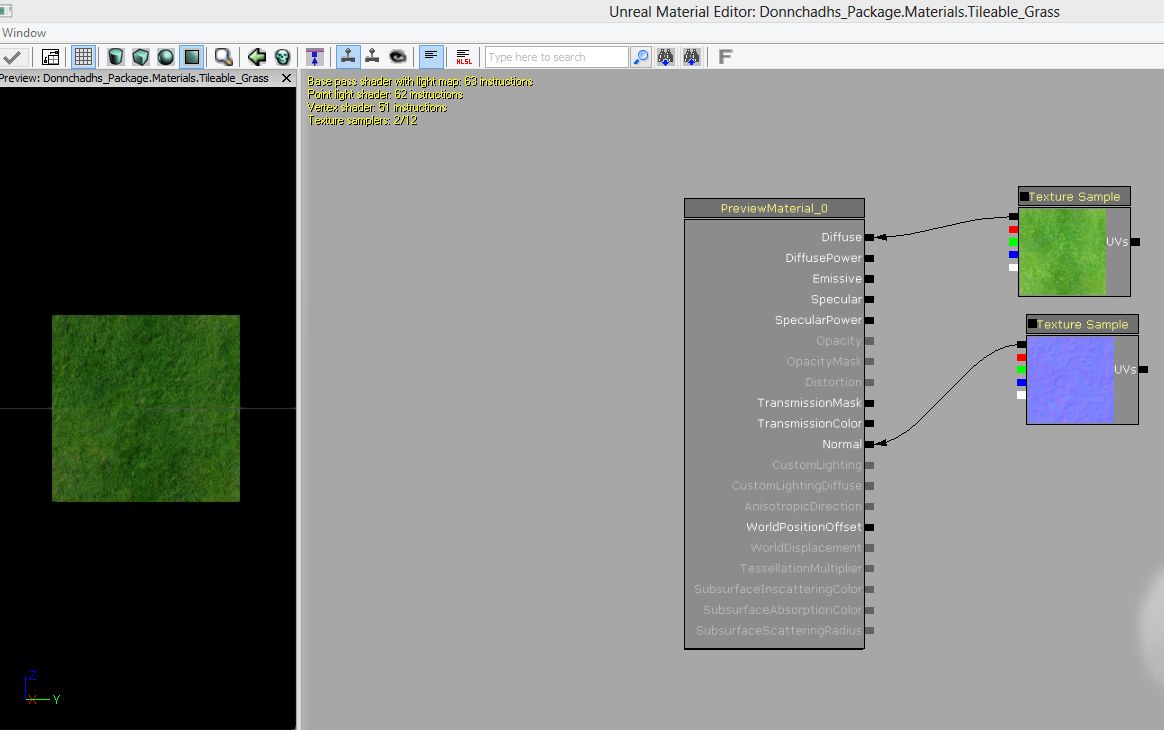
adding texture to a material
  • how to make a bot spawn and try to kill the player,
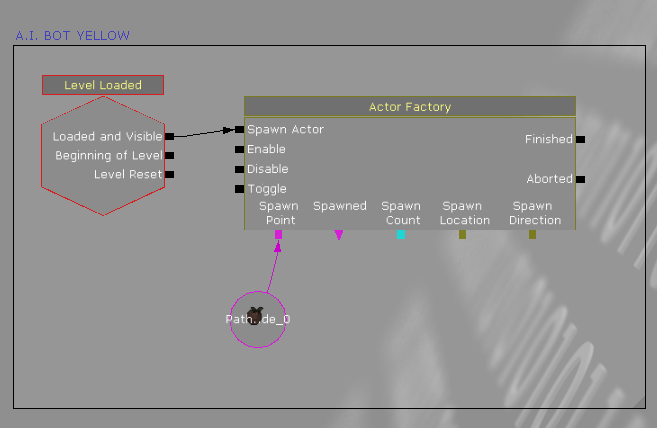
kismet for standard bot
  • how to make a bot spawn in a vehicle,
kismet for spawning a bot in a vehicle
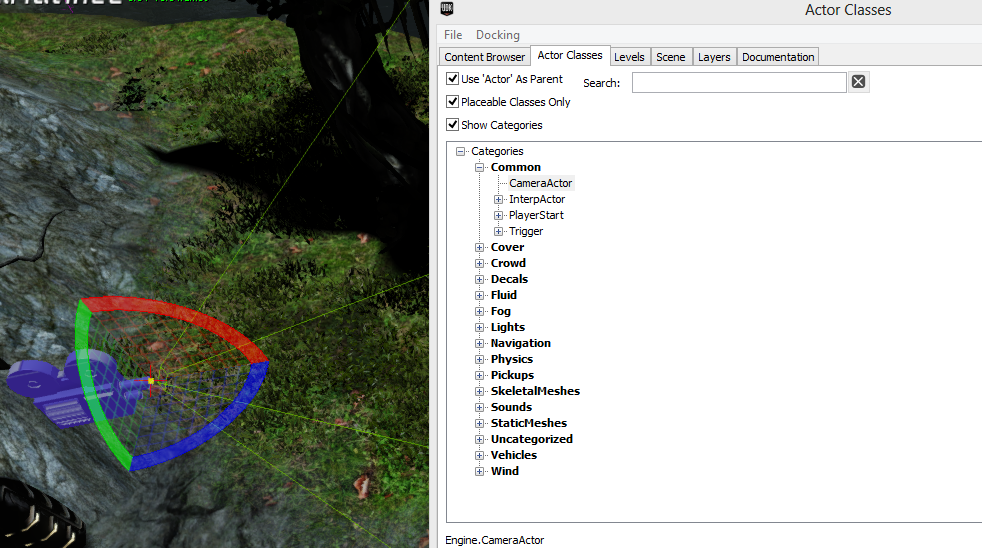
  • how to add fog and wind,
actor classes, wind and fog are found here
  • how to add foliage (trees,grass) using the foliage editor,
Foliage editor
  • and even how to add and edit lighting.
Dominant Directional  Light properties
Tthat is just to name a few of the things that I have learned to do in my time with UDK.

To concluded I hope to continue my studies in Games Programming and Development as the experience so far has been one of great enjoyment and over the course of such a short time I have learned so much about in designing and creating a game.

Tuesday 1 April 2014

3D Game Update

Since the last time I have posted about it I have added in a damaging Physics volume around a "shrine" in my map

Properties of a physics volume
You just need to have the red builder brush at the desired size then click on add volumes and add a Physics Volume. With one added you just need to add a damage per second and change the damage type to none. The last step is to tick pain causing so it will actually damage the player.

I have also added in a rotating key that spins once all the correct objects are in place. I achieved the spinning by rotating the key 180 degrees every .5 of a second for 1.5 seconds. Then I ticked looping on the matinee sequence and also increased the play rate so it seemed faster than it would normally

My static mesh key
I added in a fractured version of a static mess into the level that activates a sequence upon taking damage.

UDK static mesh editor, fracture tool.
One of the last things which I have added in is a weapon locker to allow the player to have access to a weapon in the level as they do not spawn with one. They can be found under the actor class tab of the content browser in the the weapons drop down under the pick up menu.

Tuesday 25 March 2014

UDK Pick ups

Today we added in several pick ups to our levels. I added mostly health pick ups as many objects in my level modify health.

To add them in we need to go to the actor classes tab under the content browser and click on the Pickups drop down menu.


You can add in weapon pickups, ammo pickups etc. We just need to click on the one we want and drag it in.

UDK actor classes tab and a health pick up actor class
Health vial actor classes

Tuesday 18 March 2014

UDK adding sound

Today we went through the process of adding sounds into UDK.
Firstly we open the content browser and search for a sound node or cue. Cue's are similar to materials and nodes are similar to nodes.

I added in one around a water fall that I have in my level to support the illusion of running water.

sound nodes in my UDK level
At the beginning of my level I have a cinematic sequence right next these sound nodes so I wanted to be able to toggle them on and off. I achieved this by adding them in as ambient sound toggle-able.

To make them toggle on and off I went into kismet and created object variables for each and attached them to a toggle.

Kismet code for toggling sound

UDK Level to do list and wish list

These list represent the work which I want to have completed for my end of year assessment. The to do list will be the soul focus of my efforts and until it is complete the wish list will not be worked on.

To Do List:
  • Planning the level/Game. (concepts)
  • Identify UDK's limitations.
  • Complete concept board.
  • Sketch several different level ideas.
  • Put more static meshes in level.
Static mesh boxes stacked on top of each other
  • Add more particle systems.
  • Add reacting A.I.
  • Make sure lighting is appropriate/realistic.
  • Add more ambient sounds.
current ambient sounds
  • Add the middle cut scene and finishing cut scene.
  • Test Level.
  • Package Level.
  • Test Level again.
Wish List:
  • Making a static mesh behave like cloth.
  • Make maze more complicated.
Current maze design
  • Make the puzzles harder.
  • Make terrain more realistic in areas.
  • Replace maze chain link with solid walls.
  • Add damaging fog that can be toggled.
  • Blinding light at the end of final puzzle.

Work Experience Review

Over the last two weeks I have been doing work placement at Cavan Institute. At the beginning of the two weeks I was assigned to a team and we were given some time to get to know each other. After this we were given a list 20 UDK tutorials, some in text form others with just the finished code, and we were asked to convert them to video tutorials.

We started off by deciding the best approach to take and we choose to do them all as a group rather than take a few individually and go through the whole process alone.

We assigned everyone a job/roll and said that if anyone wasn't happy on the second day we would swap the jobs around and see if things improved. I was given the job of actually recording the videos and voicing over them. The other three people were give the jobs of editor, script-er and reverse engineer (for the tutorials of only finished code).

After this we started into the tutorials. I was surprised at home much easier these basic tutorials were for me to learn than at the beginning of the year. I can honestly say that over the course of the two weeks I felt I learned more about Kismet and UDK than I had through my course. That being said I think that the two weeks and the inclusive work had been more so revision than learning anything new and was therefore far easier for me to "relearn".

All of the videos that we completed are available on the Online Design Teacher YouTube channel.

Image taken off of the updated Online Design Teacher YouTube channel

Friday 28 February 2014

UDK adding normal's to textures

After I had a functioning texture saved as a .tga or targa, I was able to create a normal for it. Normal's are height information that give depth to textures. We used a software called Crazy Bump to create the normal's.

Crazy bumps main menu
We add a opened a photograph from file and selected in which direction we wanted the height to go. This is really redundant because it can be changed after this step.

select weather the normal is coming out of the wall or going into it. 
Once selected we get a pop-up of a preview window and some sliders.

Crazy bump, editing screen
You can really just play around with these until your happy with the result. It must be saved as a .tga
After this we import the saved file into UDK. Just import it to your personal package to keep things clean.

UDK import screen
Then the only thing left is to create a new material and attach our normal and our diffused to it.

Plugging in textures and normal into the correct blocks
 The finished result can look something like this.

Finished and applied texture with normal


Tuesday 25 February 2014

UDK Cinematic Sequneces

Today we learned how to create cinematic sequences. I followed the world of level design tutorial.
I created a small intro scene where the camera directs the player to a key within my level.

I started off by adding a camera in from the actor classes section of the content browser

Adding in a camera actor into UDK

After that I added in a trigger and then went into kismet. I attached the trigger to a toggle cinematic mode block which locks the player in place so they can't move while the scene is playing.
I then plugged it into a matinee and another cinematic to "un-stick" the player when the matinee finished

Kismet for a cinematic sequence

To start making the cut scene I opened the matinee and right clicked and added a new camera group and a director group.
Then I dragged the camera along the path I wanted adding in key points by pressing enter along the way.

UDK Matinee 


UDK matinee
Sounds can also be added in by adding a play sound block and using sound cues from the content browser. Just attach them to the start of the matinee and the end of the matinee, but I did not do this as of yet.

Tuesday 11 February 2014

UDK explosions

We started off by adding in a trigger and a particle effect. Mine is of an explosion.
There are many options available in the content browser.

Content browser, particle effects

We then have to go into kismet and begin to program. We add a trigger of type touch. We then add a toggle and modify health block. We the add a variable of player and attach it to the trigger as instigator and to the modify health as its target.

Kismet for damaging health

 Next we select the particle effect which we added and right click in kismet and add both an object variable and  new event using " particle effect" particle event. We then attach the new object variable to the toggle as its target and the modify health as its instigator.

Finally we attach the particle event to the toggle as an event.

Kismet for damaging explosion

The very last thing to do is to click on modify health and change the amount, radius and falloff to suit your requirements

Properties of modify Health


UDK flashlight

Note: You must set a game type under world properties

We start by dropping in a spotlight move-able and a player start. They must be close to each other and facing the same direction.

Converting a light to a spotlight movable

We then can jump into the lights properties and decrease the lights influence area and colour to give it a glow to make it seem more like a torch.  

Spotlight properties

Once its in the next step is to jump into kismet and start a bit of programming.
We start by adding a level loaded and attach to actor block. We set the attach to actors target to players and un-tick the option within it that selects all players. We then must a attach the light to its attachment option. 

Flashlight kismet

At this stage the light will work and follow the player however the lower part of the code deals with making the light toggle-able. Add in the key/button pressed and toggle blocks.

We add E as an input name. Then when pressed it will activate the toggle block and toggle the light on and off.

Kismet for toggling flashlight

This is the finished result.

Finished flashlight in UDK

UDK lighting/triggers continued

Note: You must set a game type under world properties

Today we worked on the lighting of our level by practicing adding toggle able lights. They can be uses fully in creating light switches and many other things.

Firstly we add in a light and then we convert it to a spotlight toggle-able. Once this is done we add a trigger of type used and jump into kismet.

Converting the light to a spotlight toggle able

We add the trigger and then drop in a play announcement block to notify the player of what action is required. We then added a toggle block in and used the light from before as its target. We must also set the triggers max trigger count to 0 if we want to be able to do this an infinite amount of times
Kismet for toggle able light


Increasing the size of the trigger is usually good practice.

Trigger to activate light

And after all of that we are left with this.

Finished toggle able light.


The same play announcement code can be used to notify the player of any new events such as entering a new area.

Trigger attached to play announcement


UDK making and adding tile-able textures

Firstly we start by getting pictures to work from. Then we take them into Photoshop and create a new page to the power of 2 i.e. 256 x 256, 512 x 256. Scale it up as necessary.

We then select the filter, other and offset. This will basically split it in four and piece it back together again.
We must offset the image by the size of the canvas it is on.

Photoshop, filter offset option

Then we use tools like the clone stamp, dodge, burn and sharpen to mask the cross section that will have appeared in the center. After using these tools we are left with something like this.

Finished tile able texture
There are no visible lines remaining through the center of the image anymore and so we are ready to save it as a Targa (.TGA) of 16 or 32 bits.

We then open up UDK and edit the and go to our package and import our new grass texture.
Make sure to give it an appropriate grouping. 

Import screen in UDK
We then must right click in UDK while on the content browser with the imported texture selected and choose to create a new material. Then we drag in our texture and connect it to the diffuse option.

Connecting my texture to the correct blocks 
You now have a texture ready to be used, however there is an additional thing called normal's for textures which we haven't covered yet but we will be soon.

Making a non-tile able texture follows the exact same process except with using the offset filter option used at the start. 

Non tileable.PNG
Finished non-tile able texture applied in UDK